Interested?

R&S®Essentials | Spectrum analyzers fundamentals

Choosing a near field probe

Paul Denisowski, Test & measurement expert

Near field probes are essential tools in the field of electromagnetic compatibility (EMC) and radio frequency (RF) design. They measure and analyze electromagnetic fields, allowing you to locate emission sources and take appropriate countermeasures to reduce electromagnetic interference (EMI).
Near field probes can help you understand why certain EMC standard emission limits are being exceeded and also play a crucial role in immunity tests, ensuring that devices are immune to EMI. These probes come in a wide range of shapes and sizes, which can affect their sensitivity, frequency response and directional characteristics. Let's take a closer look at near field probes, how they work, how to use them and how you can choose the best one for your purposes.

Near field probe basics

Far field vs. near field

The near field is the region of the EM field that's close to the source of radiation - think within a few centimeters from the DUT. The far field, of course, is the region that's further away. The big difference between the two is the magnitude of the electrical (E) and magnetic (H) fields. EM waves have both E and H components, which are perpendicular to each other. In the near field, either the E or H field is much stronger than the other, depending on the characteristics of the emission source. But in the far field, both components have pretty much the same magnitude.

All signals that can be detected in the far field can also be detected in the near field. The reverse, however, is not necessarily true.

Near field probes for EMC applications

EMI compliance testing is important to make sure that emissions from your DUT does not exceed a specified limit, such as an EMC standard. It's like a check-up for your device that lets you see if it's emitting more radiation than it should be. Near field probes play a crucial role in this process by helping to identify the sources of non-compliant emissions from the device. By detecting EMI problems early on, these probes allow for corrections to be made before formal compliance testing, which can save time and resources.

Near field probe types

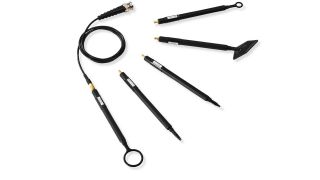
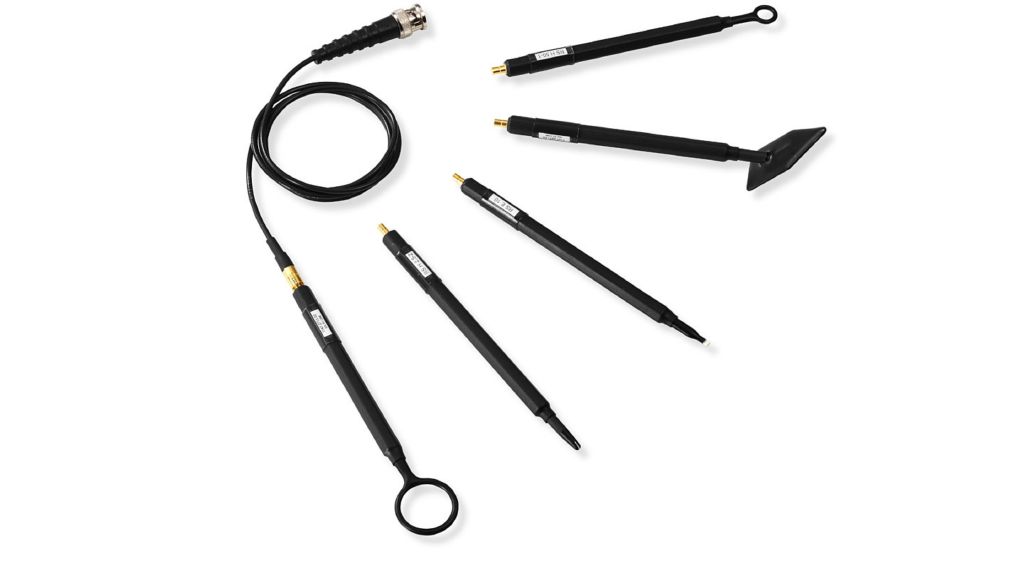
Before you perform a near-field analysis, you need to know how the E and H fields are distributed. This can be accomplished with the two main types of near field probes: electric (E-field) probes and magnetic (H-field) probes. Electric field probes measure the electric field component of an electromagnetic wave, while magnetic field probes measure the magnetic field component. These probes also come in convenient sets, such as the R&S®HZ-15 and R&S®HZ-17, that include both types in different designs and sizes.

E-field probes

Let's take a closer look at electric field probes. These probes are all about detecting voltages, rather than currents, since they're designed to respond to the electric field. For the best response, you'll want to hold the probe perpendicular to the current. But don't worry too much about getting the exact orientation right - it's not critical to performance. What is important, though, is the size of the probe. Smaller probes mean higher spatial resolution, which makes it easier to track down exactly where that pesky emission is coming from. For example, the narrow electrode of the RSE 10 probe, included in probe sets R&S®HZ-15 and R&S®HZ-17, can select a single conductor track among a bundle of tracks 0.2 mm in width.

H-field probes

If you're dealing with high frequency emissions, you’ll want to pick up some H-field probes. They look like little loops, and different loop sizes are better suited for different purposes. These probes respond to the magnetic field and detect current changes rather than voltage. When you use H-field probes, you need to pay attention to the orientation of the loop relative to the direction of current flow. And while larger loops have greater sensitivity, smaller loops have better spatial resolution. So, you might want to start with a bigger loop and then switch to a smaller one for more precise pinpointing. It's all about finding that perfect balance between sensitivity and resolution!

Near field probe set with both E-field and H-field probes

How to use near field probes

Using E-field probes

When you're using an E-field probe, it's best to hold it perpendicular to the surface of whatever you're testing. That way, you can get the most accurate readings possible. To start off, it's a good idea to use a larger probe to get a general sense of where the emissions are coming from. Once you've got that figured out, you can switch to a smaller probe to get a more precise reading of the source.

How to use an E-field probe

Using H-field probes

H-field probes are loop probes, so they are super picky about which way they're facing. For the best response, it's important to make sure the loop is oriented in the same direction as the current flow. You’ll get the strongest response when the magnetic field lines pass through the loop. Conversely, the response will be the poorest when the lines are parallel to the plane of the loop. So, if you're using an H-field probe, keep fiddling with the orientation until you get the strongest response.

Turn and move the probe to see where you get the strongest response

What you should look for in a near field probe

Choosing the right near field probe is like finding the perfect outfit - it depends on the occasion. Make sure you pick the probe that's best suited for your application.

  • First of all, ensure that the probe or set of probes is compatible with your measuring device, whether that is a spectrum analyzer, an oscilloscope or both.
  • Determine whether you need both E-field and H-field probes. Probes are usually not sold individually but in sets. Make sure that the set contains the type of probes you need.
  • Check the frequency range of the signals you will be working with. Near field probe specifications indicate frequency ranges, and it is important to choose the correct probes for the frequency range of your signal. If you work with signals in a wide range of frequencies, you should select a set with many probes, each optimized for a different frequency range.
  • Confirm your desired spatial resolution. This is what determines the level of detail that can be captured. For example, complex devices often have multiple sources of emission in close proximity to one another. Here, a high spatial resolution is necessary to properly isolate and measure each individual source. Generally, a high spatial resolution is desirable, but it may not always be necessary. If, for example, the EMI testing is focused on whether a device emits excessive radiation, and the specific source is not a concern, a lower resolution probe may be sufficient
  • The probe sensitivity is another important point of consideration. Low level signals can only be detected with high-sensitivity probes.
  • Finally, you should consider whether you need a passive or an active probe. Most near field probes are passive. This means that they do not require external probe power. They tend to be more rugged and less expensive than active probes. However, active probes do provide a higher bandwidth performance. For scopes with more than 500 MHz of bandwidth, an active probe is more appropriate. You can explore an extensive range of active broadband probes on our site.

Dealing with a low signal-to-noise ratio (SNR)

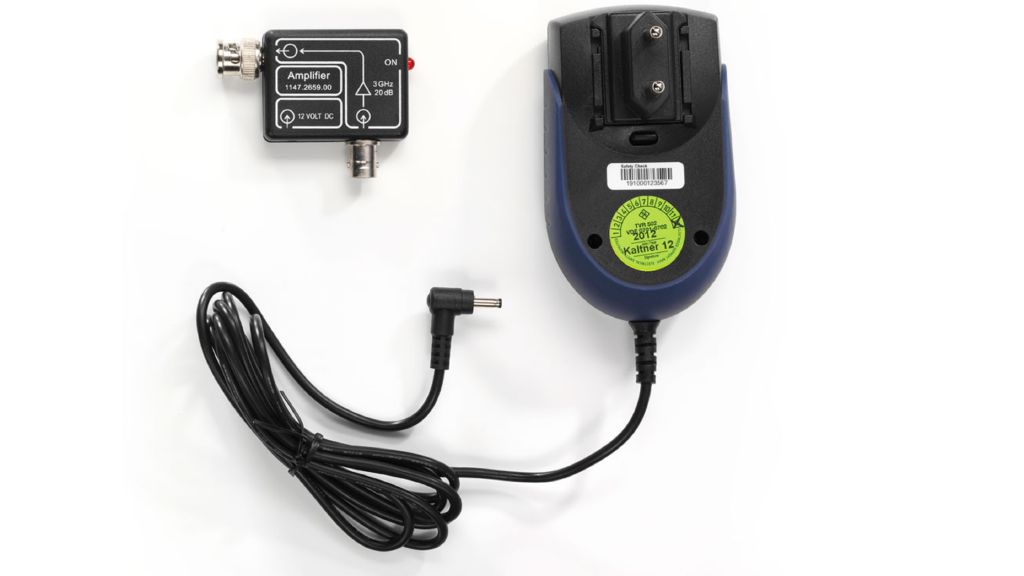
Now that you’ve chosen the best near field probe for your purposes, it is important to address one issue that you are likely to encounter when using it: low signal to noise ratio (SNR). Luckily, this problem can be easily solved with a preamplifier.

You can place a preamplifier between a probe and instrument input. This tool amplifies signals, making them easier to measure. This is particularly helpful when searching for smaller emissions and when instrument noise is high. It can also be useful when you’re using a smaller H-field probe because, as mentioned above, a smaller H-field probe allows for greater spatial resolution but has decreased sensitivity.

High SNR vs. low SNR
R&S®HZ-16 preamplifier

Summary

  • The near field is an area of the electromagnetic field that is close to the source of emission.
  • Near field probes are used to detect and measure electromagnetic emissions from electronic devices.
  • There are two different types of near field probes: E-field and H-field.
  • E-field probes should be held perpendicular to the conductor surface; H-field probes should be oriented such that the magnetic field lines pass through the loop.
  • There are several things you should consider when choosing a near field probe: compatibility, type, spatial resolution, probe sensitivity and bandwidth of measuring instrument (e.g., oscilloscope).
  • A preamplifier can be used to solve low SNR.

Do you want to know more?

Curious to learn more about test fundamentals?

Sign up for our newsletter